Migrate from Snipe-IT to a Discovery-Sourced CMDB: A Practical Cutover

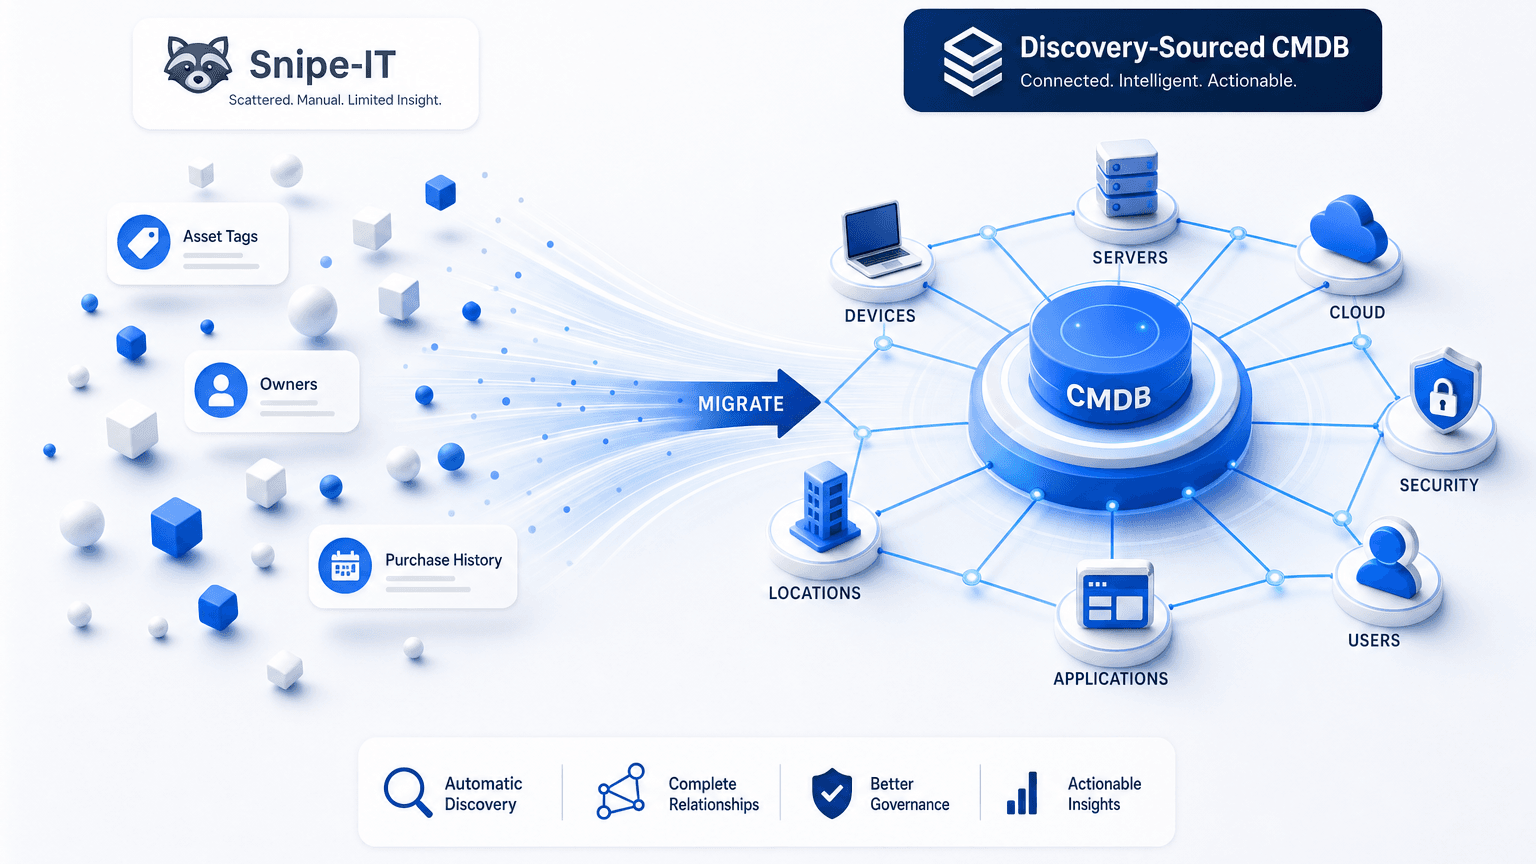
The decision to migrate from Snipe-IT is already on the table. Years of asset tags, owners, purchase dates, and status labels sit in the custody register. The first discovery scan is about to surface devices the register never held, while Snipe-IT still lists machines no scan can reach. Both lists are findings for the first month.
This page is the cutover plan into a discovery-sourced configuration management database (CMDB). It covers what to export, which records become configuration items (CIs), which fields a scan can own, how Virima’s CMDB keeps CIs sourced and governed, how lean IT runs the same mechanics, and the first month. For whether to stay, pair, or add a discovery layer, use the existing decision guide on Snipe-IT and discovery-sourced CMDB paths.
What to export from Snipe-IT first
Run a full backup before any export. Snipe-IT’s own guidance is to use Admin > Backups before you trust an importer run, and the same habit protects an outbound cutover. Keep that backup offline as custody archive.
Export against Snipe-IT’s object model:
- Assets with custom field values
- Models, categories, manufacturers, suppliers
- Locations, companies, and departments
- Users and status labels
- Licenses and seats
- Accessories, consumables, components, maintenance records, and attachments, if used
- An activity report, plus the custom field definitions (values travel as plain text keyed by field name)
You can pull the asset list from the web UI or walk each object type through Snipe-IT’s REST API, which is paginated and covers most interface actions. Treat the asset tag as the join key for every later match. Snipe-IT documents tags as unique identifiers for hardware labels, the safest bridge into the CMDB import.
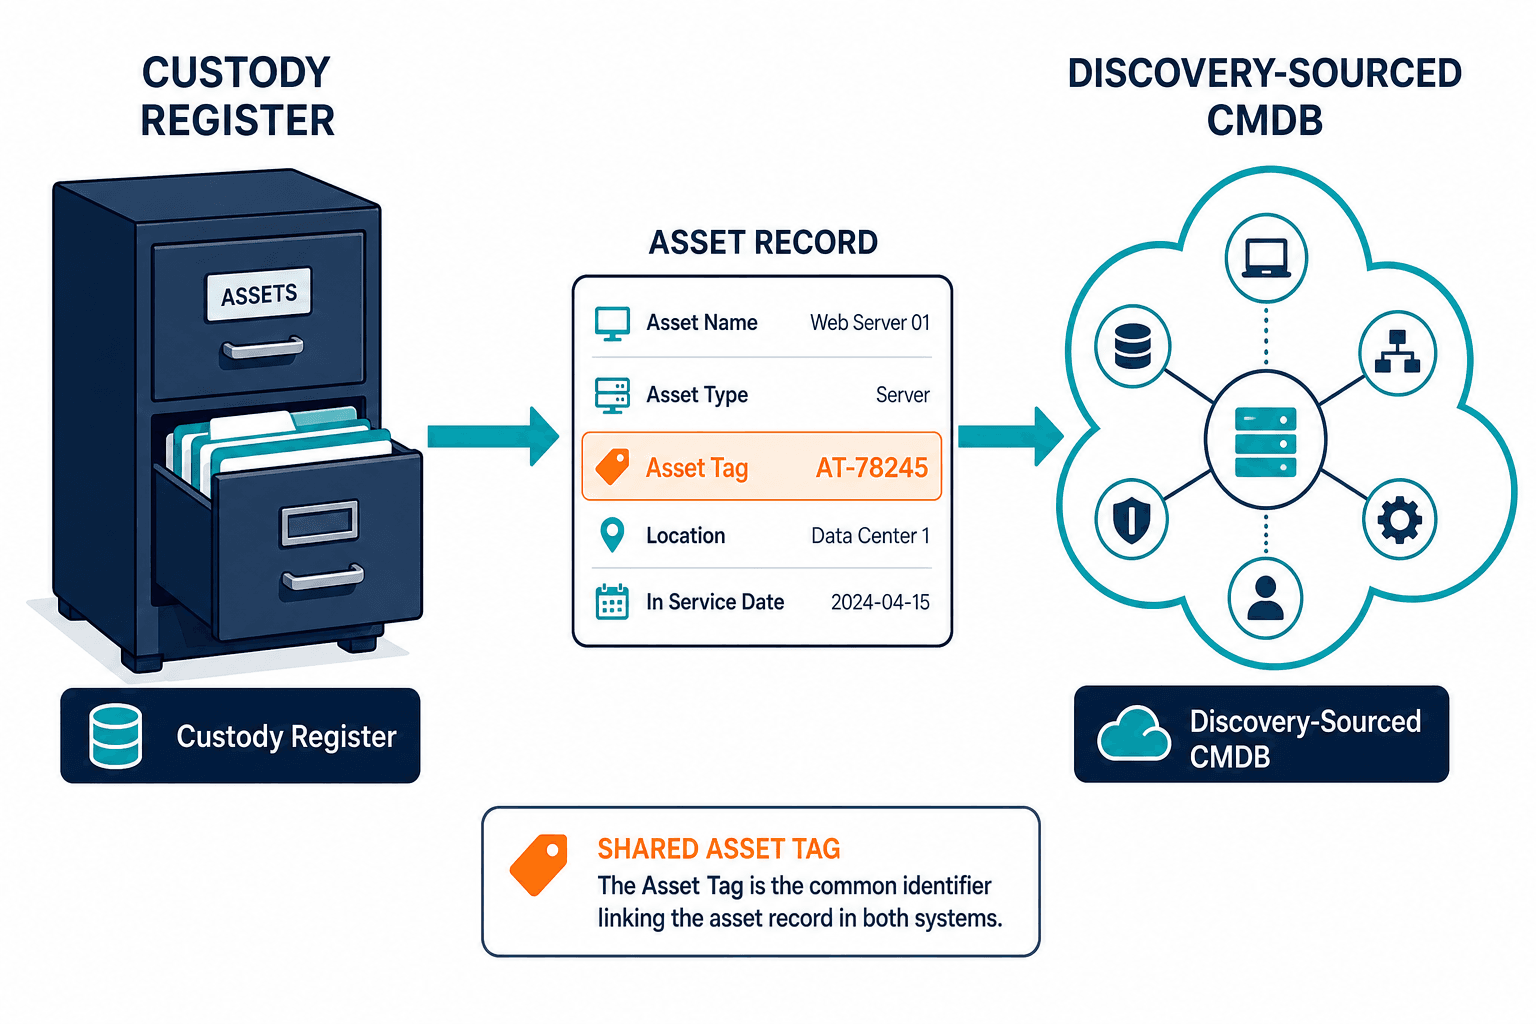
Decide history scope before you load anything. Move current state and ownership into the discovery-sourced CMDB as the system of record for technical configuration, and keep the backup plus activity report as a checkout archive. When you map columns, use the fields Snipe-IT’s own importer maps as the checklist for names, serials, models, status, warranty months, locations, purchase data, and checkout targets. Confirm the backup step against Snipe-IT’s importing documentation before you overwrite either system.
Which Snipe-IT records belong in the CMDB
In CMDB terms, “belongs” means the record is a configuration item under change control. A configuration item is a component managed under that process. Peripherals and hardware sub-components stay outside that class. Virima’s CMDB overview spells out what counts as a configuration item, and it is this cutover’s destination layer.
A discovery-sourced CMDB differs from a custody register in its job. Snipe-IT tracks who holds the laptop and when it was purchased. The CMDB holds the CI change boards and incident desks trust: hostname, serial, installed software, network identity, relationships, operational owner, and last-verified presence. Virima populates that CMDB from multi-source discovery and keeps each CI with a verified source tag, freshness timestamp, and ownership context so records stay explainable after import.
Map Snipe-IT category and model to a blueprint, which is Virima’s CI class. Every CI is derived from a blueprint that defines properties and relations. Custom fields become CMDB properties on each blueprint. Status labels become status values on the CI. Locations and users map across as locations and owners. Servers, endpoints, network gear, and cloud resources under change control are the usual CI set. Accessories, consumables, and components stay in inventory or custody records in ITAM or in Snipe-IT.
Build the import file from Virima’s template. In Admin > SACM, Export CI Template lets you pick blueprints, properties, and components, then exports an Excel file you fill from the Snipe-IT export. Virima documents file import (xls, xlsx, csv) as one of three ways CIs enter the CMDB, alongside manual entry and discovered items you review and move. Pilot one site or category first so correlation and mapping prove out before full register load.
Which fields a scan can own and which still need a person
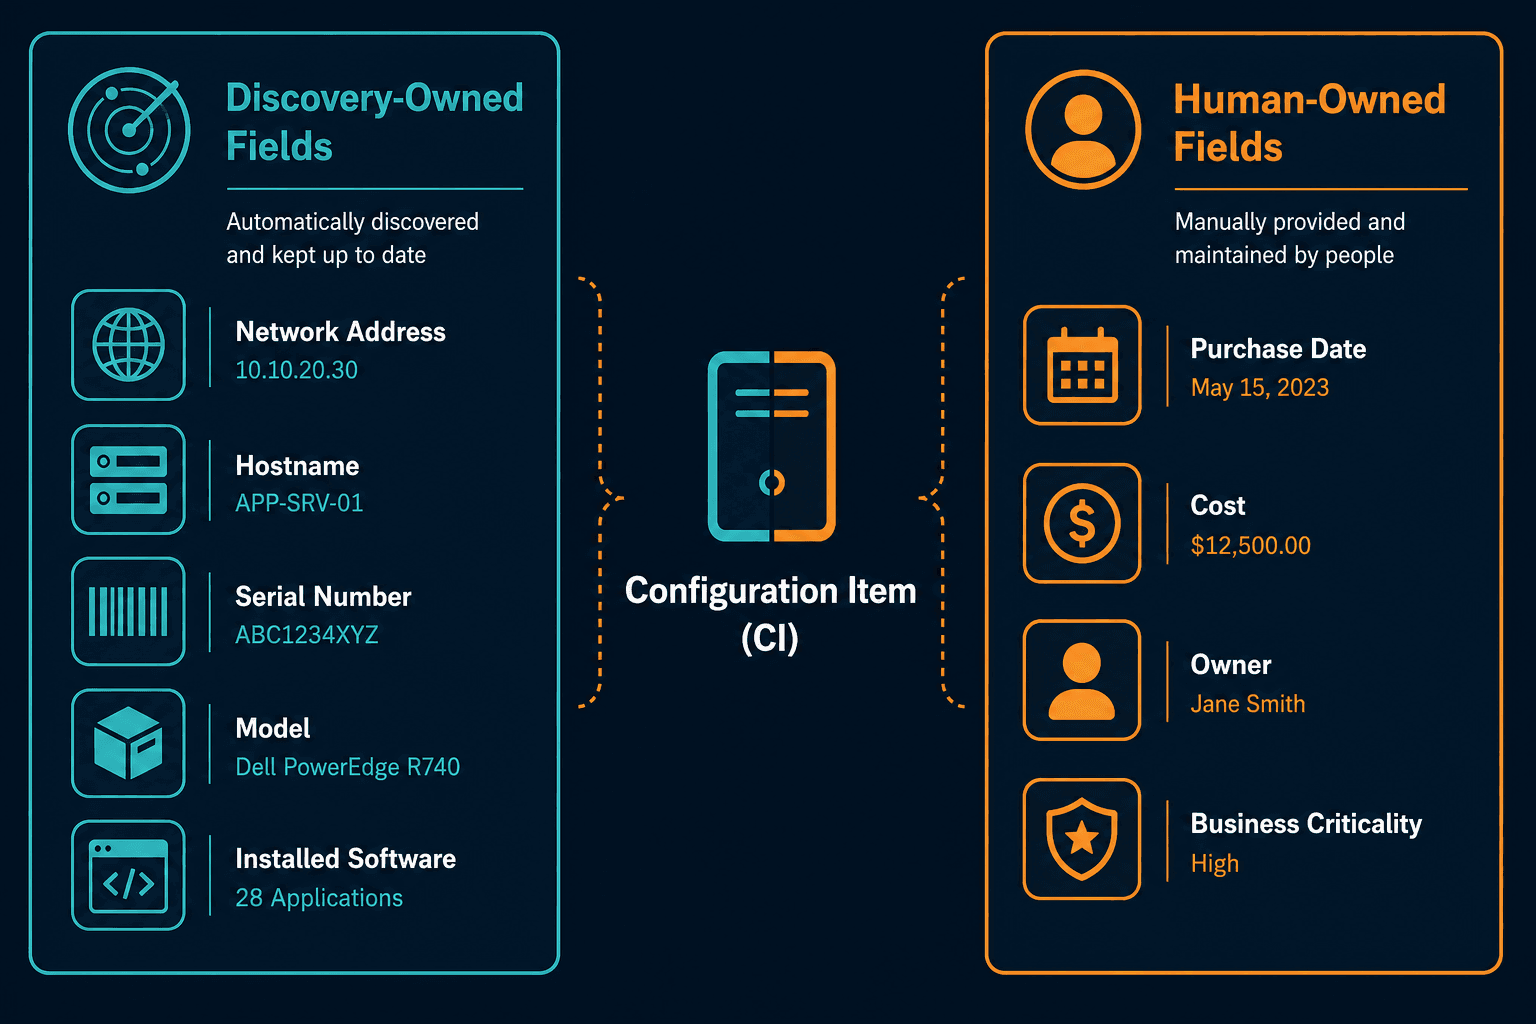
Give each field one system of record after cutover. A scan can read what is present on the network or through an agent; people and procurement still own what a scan cannot see. In Virima’s model, discovery-reachable attributes land on the CI with source and last-verified data.
What CIS Control 1 sets as the baseline
CIS Control 1’s minimum inventory fields set a useful baseline: network address when static, hardware address, machine name, owner, department, and whether the asset is approved to connect. For Implementation Groups 2 and 3, Control 1.3 calls for an active discovery tool run daily, or more frequently. Control 1.2 asks for a weekly process that addresses unauthorized assets. Those cadences shape week four in the plan below.
Field-by-field ownership after cutover
| Snipe-IT field | Owner after cutover | Why |
|---|---|---|
| Name/hostname | Discovery into the CMDB | A scan reads the live name |
| Serial, model, manufacturer | Discovery, matched to the asset tag | Tag stays the join key |
| OS, installed software, hardware components | Discovery into the CMDB | Hardware and software inventory come from scans |
| IP and hardware address | Discovery into the CMDB | Addresses change without a person editing a form |
| Warranty | Warranty integrations for listed vendors; ITAM for the rest | Scope warranty automation to vendors on the hub |
| Owner / assigned user | Snipe-IT if it remains the custody tool; otherwise ITAM assignment | Custody is a human record |
| Purchase date, cost, order number, supplier | ITAM or procurement | Financial fields are not discoverable |
| Business criticality, SLA, lifecycle status | People through ITAM and service definitions | A scan cannot see business intent |
For warranty and endpoint sources, use Virima’s warranty and endpoint integrations hub once. Dell and Lenovo warranty connectors, plus Intune and SCCM endpoint sources, appear there. Keep last audit date in Snipe-IT if physical audits continue. Discovery’s last-verified timestamp on the CMDB CI shows when configuration was last confirmed on the network or by an agent.
Source tags, duplicate handling, and dependency maps aren’t enterprise-only
Teams often assume a discovery-sourced CMDB only arrives with a multi-year enterprise program. That is not the case here; the cutover uses the same mechanics enterprise estates run inside Virima’s CMDB:
- Staged review before items become CIs, with configurable correlation and business rules for what moves in
- Duplicate remediation, source tags, and last-verified timestamps on every CI
- Authority rules for when sources disagree
- ViVID™ service maps built from your service definitions plus discovery data
- Bidirectional ITSM sync and a full REST API
Those CMDB and mapping capabilities sit on the same platform for Business Pro and Enterprise. What differs is licensing structure, how assets are metered, how discovery apps are deployed across segmented networks, and support model. Write those differences in procurement notes; this cutover needs no prices. Virima’s Business Pro page describes onboarding support that gets discovery producing data without a lengthy custom build, scoped to your network layout and credential access.
ViVID™ service maps still need two human inputs on top of the CMDB: your team defines business services once in the UI or by CSV, and incident and change overlays need a supported ITSM platform such as ServiceNow, Ivanti, HaloITSM, Xurrent, Jira Service Management, or TeamDynamix. Partner names stay plain text; connect via the integrations hub for tickets.
How Virima’s discovery-sourced CMDB fits lean IT and growing mid-market teams
Small and midsize IT teams often stay on a custody tool longer than the network graph allows because “CMDB” still sounds like a platform program. You already hold asset tags, owners, and purchase history in Snipe-IT. What is missing is a governed CMDB that discovery can refresh on a schedule you keep, with CIs that change control can trust.
- Virima is built as that destination layer. Scheduled multi-source discovery feeds Discovered Items for review. Your team checks correlation and business rules, then moves approved records into the CMDB. Each CI carries source and last-verified context. ITAM covers assignment and financial fields a scan cannot invent. After you define a short list of business services, ViVID™ builds dependency maps from those definitions plus discovery data for blast-radius context in incident and change work.
- For lean operators, install the Discovery App on a Windows server you control so credentials stay local. Pilot one site or category from the Snipe-IT export. Reconcile the two mismatch lists in week two, then expand after completeness and ownership rules hold. Keep Snipe-IT for labels and checkout when that workflow still earns its keep, and let the CMDB own technical truth through a field-ownership split plus API or CSV exchange.
- Growing mid-market estates add cloud accounts, remote endpoints, and an ITSM system of engagement. Virima’s CMDB sits under those tickets with bidirectional sync on supported platforms, while discovery keeps the CI population honest between change windows. You still define services and still review before bulk Move to CMDB. The thirty-day shape is the same for lean IT and larger mid-market teams: export, classify, discover, reconcile, map, schedule.
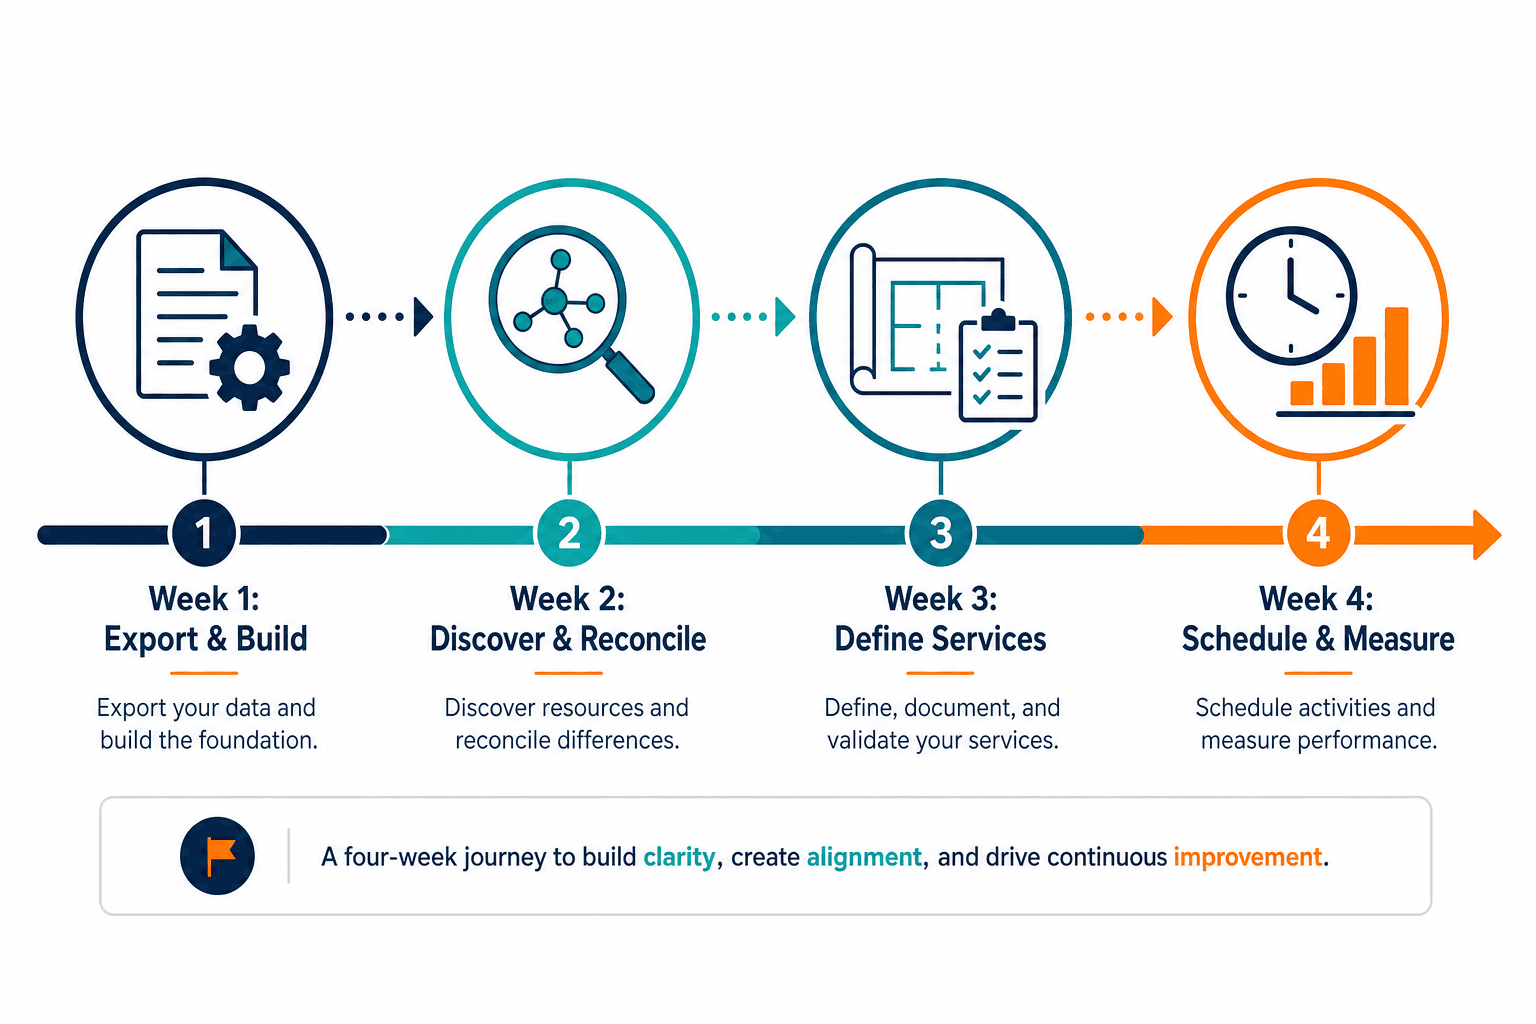
A 30-day Snipe-IT to CMDB migration plan, week by week
Treat the calendar as recommended pacing. This discovery CMDB cutover follows four weekly phases; timing still depends on network segmentation, credential access, and register quality.
Week 1: Back up, export, and build the import file
Back up Snipe-IT from Admin > Backups. Run the object exports described earlier. Choose blueprints for the pilot slice, export the CI template, and fill it from the Snipe-IT file using asset tag as the match key. Import one site or one category into Virima’s CMDB, then spot-check owners, status, serials, and locations against the register before you expand scope.
Week 2: Run discovery beside Snipe-IT and reconcile
Install the Discovery App on a Windows server your team owns and controls. Add credentials for the first network segments and cloud accounts you will cover, and deploy agents to off-network machines that still need inventory. Run scheduled scans with agent-based, agentless, and API-based discovery as the estate requires. Credentials stay encrypted on that server; scan results feed Virima and stage CMDB candidates.
Open Discovered Items after the scan completes. Virima separates items that are new to the CMDB from items that already match a CI, and correlation rules are configurable. Select records and use Move to CMDB only after the scan finishes. Docs note that a moved record cannot be pulled back as a discovered item, so review rules before bulk moves.
Work two lists in parallel, matching the CIS Control 1 comparison pattern. List A holds Snipe-IT records discovery did not find. List B holds assets discovery found that Snipe-IT never held. Expect normal mismatches such as storage devices, retired items still marked active, renamed hosts, agent-only laptops, and duplicate names. Archive, correct status, tag as off-network, or merge on the durable key.
Week 3: Define services and add relationships
Define your top handful of business services once in the UI or by CSV import, and add relationships a scan cannot invent, such as ownership chains and known service membership. ViVID™ builds dependency structure from those definitions plus discovery-sourced CMDB data and refreshes maps as new scan data arrives. If your ITSM platform is supported, connect it so incidents and changes can overlay the map.
Week 4: Set the schedule, measure, and choose Snipe-IT’s role
Set the scan schedule you can keep. CIS Control 1.3 points Implementation Groups 2 and 3 at daily active discovery or more often, and Control 1.2 expects a weekly process for unauthorized assets. Measure completeness with the ratio of CIs in the CMDB to CIs discovered, the completeness formula Virima documents in its health-score guide. Decide Snipe-IT’s end state below, and archive the final pre-cutover backup.
Where Snipe-IT fits after the cutover
Three end states cover most lean estates:
- Retire Snipe-IT after the backup is archived and CI classes are stable in the discovery-sourced CMDB
- Keep it for labels and custody when barcode checkout remains the weekly job
- Pair it with Virima’s CMDB when both jobs stay real
Keep the custody path fair to Snipe-IT’s strengths. Snipe-IT describes assets as anything with an asset tag, with tags meant for barcode labels and check-out to people so someone stays accountable. That job still matters when hardware moves across desks. Read Snipe-IT’s own note on asset tags and check-out accountability when you write the operating procedure. If both systems stay, lock field ownership and exchange data through each product’s REST API or CSV. Virima’s integrations hub does not list a packaged Snipe-IT connector, so plan the pair path on API or file exchange.
After the first month
After the first month, Virima’s discovery-sourced CMDB owns the technical fields discovery can verify, the register is reconciled against both lists, services are defined for the maps you need, and Snipe-IT’s role is an explicit decision. Ownership rules and the scan schedule should be written down, and Move to CMDB should follow review.
Ready to plan your cutover from a custody register into Virima’s discovery-sourced CMDB? See what Business Pro includes for discovery, CMDB, and ViVID™ maps on the same platform.
Frequently Asked Questions
How do I migrate from Snipe-IT to a discovery CMDB?
Back up Snipe-IT, export assets and related objects, map categories to CI blueprints, import a pilot, run discovery beside the register, reconcile both mismatch lists, define services, then lock Snipe-IT’s end state.
What is a discovery-sourced CMDB in Virima?
Virima’s configuration management database, populated from scheduled multi-source discovery. Each CI carries a source tag and last-verified timestamp, with review before Move to CMDB.
Which Snipe-IT records should become configuration items?
Promote servers, endpoints, network gear, and cloud resources under change control. Leave accessories, consumables, and components in ITAM or Snipe-IT as custody or shelf inventory.
Can lean IT or growing mid-market teams run Virima’s CMDB after Snipe-IT?
Yes — the same discovery, CMDB, ITAM, and ViVID™ path applies. Pilot one site, review before Move to CMDB, keep Snipe-IT for labels if needed, and scale scans by segment.
Can I keep using Snipe-IT after adding a discovery-sourced CMDB?
Keep it when labels and checkout accountability still matter. Give each field one owner, and exchange data through REST APIs or CSV rather than a packaged connector.
How long does a Snipe-IT to CMDB cutover take?
Thirty days is a sensible target for a small, well-segmented estate with credentials ready. Duration still depends on network layout, register data quality, and mismatch volume.