CMDB Implementation: A Step-by-Step Guide
Most CMDB implementations don’t fail because of a bad tool choice. They fail because the foundational decisions were wrong before the first scan ever ran.
Too wide a scope in Phase 1. No reconciliation logic for multi-source data. No one accountable for CI ownership after go-live. Discovery treated as a one-time project instead of an ongoing operational function.
I’ve worked with IT teams on CMDB implementations across a range of environments — mid-sized enterprise, multi-cloud, hybrid data center, ServiceNow shops, and homegrown ITSM setups. The failure pattern is almost always the same: strong start, good intentions, stale data within twelve months, and a CMDB that’s technically live but practically useless.
This guide is built to break that pattern. It’s a practical, step-by-step CMDB implementation plan written for IT managers, IT directors, configuration managers, and ITSM practitioners who need a working CMDB — not just a populated one.
Why CMDB Implementations Fail (And Why Yours Doesn’t Have To)
Before getting into the steps, it’s worth being direct about where things typically go wrong. Research from Information Technology Intelligence Consulting (ITIC) found that 98% of organizations say a single hour of unplanned downtime costs more than $100,000 — and for a third of enterprises, that figure climbs between $1 million and $5 million per hour. The CMDB is the foundation that prevents that downtime. Most CMDB projects struggle with one or more of three root causes.
Over-scoping Phase 1. Teams try to populate every CI type across every environment on day one. The volume of data becomes unmanageable, reconciliation logic breaks down, and the team burns out before the CMDB is useful to anyone.
No ownership or governance model. Someone populates the CMDB. Nobody is accountable for keeping it current. Without assigned CI owners and regular health checks, drift is not a risk — it’s a certainty.
Treating discovery as a one-time event. The environment changes constantly. Discovery needs to run on a recurring scheduled cadence so the CMDB reflects what’s actually deployed today — not what existed when the project launched.
All three of these are avoidable. The steps below address each one directly.
Before You Start: Align on the Purpose of Your CMDB
Your CMDB is only as useful as the decisions you will use it to support. Before defining a single CI class or running your first network scan, your team needs to agree on the primary use case.
Common use cases include:
- Supporting incident and problem management with CI impact context
- Enabling change management through downstream dependency visibility before change windows
- Driving IT asset management and software license compliance
- Powering service mapping to show what infrastructure supports each business service
- Feeding IT operations dashboards and alert correlation
Knowing the primary use case changes how you scope CI types, which relationships you need to map, and what data quality thresholds matter most. Pick the top one or two use cases and write them down. Every scoping decision downstream flows from that choice.
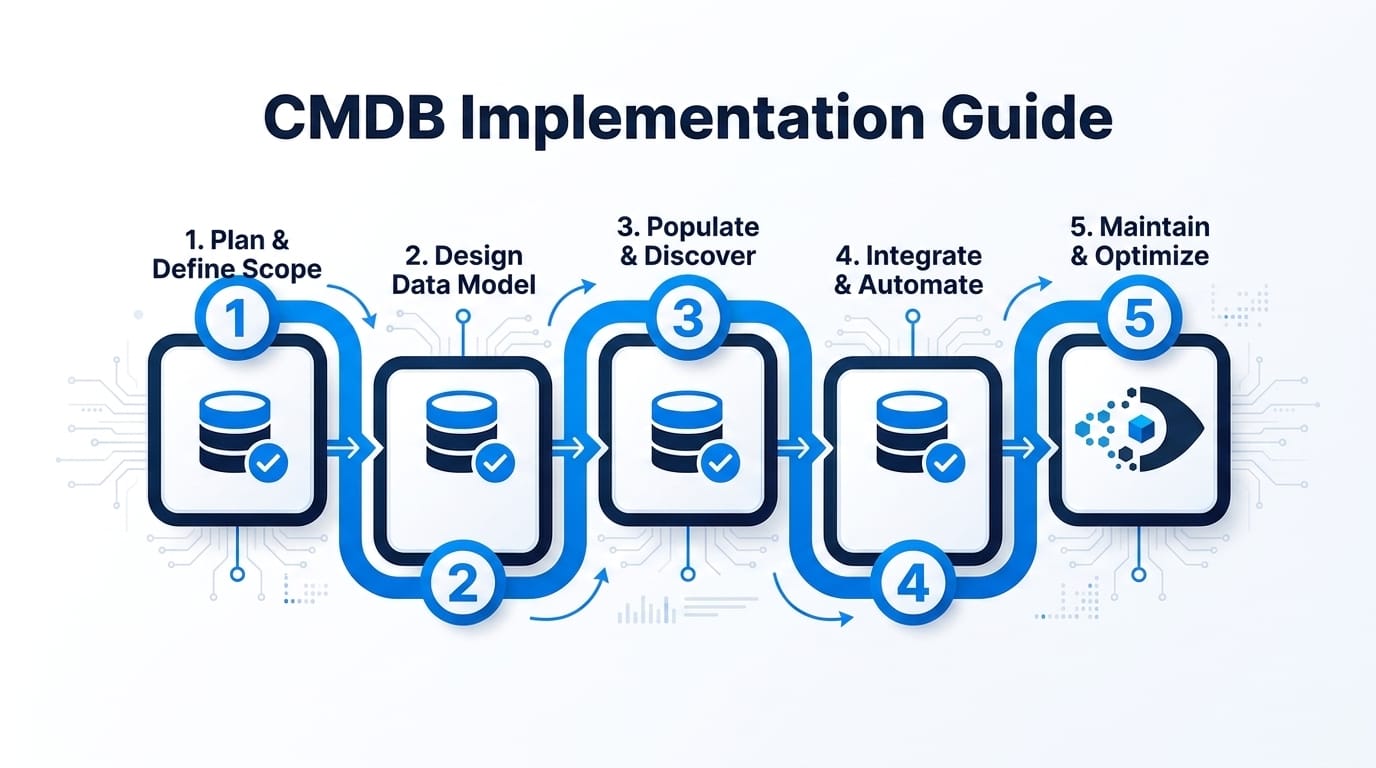
The 9-Step CMDB Implementation Plan
Step 1: Define the Scope — Choose Your CI Types
The most dangerous move in a CMDB implementation is trying to capture everything at once.
Start by identifying the CI classes that directly support your primary use case. For most teams, a reasonable Phase 1 scope includes:
- Servers (physical and virtual)
- Network devices (routers, switches, firewalls)
- Applications and key software systems
- Databases
- Cloud instances (AWS EC2, Azure VMs, GCP compute nodes)
- End-user devices (if ITAM is a core use case)
For each CI class, define which attributes are mandatory, your completeness threshold, and which CI classes belong in Phase 1 versus later phases. Keeping Phase 1 scope to three to five CI types is not cutting corners — it’s how you build a CMDB that earns stakeholder trust.
Step 2: Choose Your Discovery Method
How you populate the CMDB depends on what’s in your environment and what level of data depth you need. For a detailed comparison of these approaches, see our guide to agent-based vs agentless discovery.
Agent-based discovery deploys a lightweight agent on the endpoint. It provides the deepest hardware and software inventory — installed applications, OS version, patch levels, serial numbers, and hardware specifications.
Agentless discovery uses network credentials to scan infrastructure without deploying software on each device. It covers the same core CI types at the infrastructure level with less depth on installed software. It’s faster to stand up and works well for infrastructure-focused use cases.
Most environments benefit from both. Virima’s IT discovery supports both methods — agentless for network infrastructure, servers, and cloud assets; agent-based for end-user devices where software data matters.
One important operational note: discovery scans run on a configurable scheduled cadence. Set your scan schedules based on how frequently your environment changes.
Step 3: Establish Data Normalization and Reconciliation Rules
In most environments, CI data comes from more than one source. Without reconciliation rules, the result is duplicate or conflicting records — and a CMDB no one trusts.
Reconciliation rules define which source wins when two sources report conflicting values, how CIs are matched across sources, and how duplicates are handled. Setting up reconciliation logic before your first scan runs is what keeps the CMDB clean. Spend real time on this step — poorly designed reconciliation rules are one of the top causes of CMDB data drift, and they’re much harder to fix after the fact.
Step 4: Set Up ITSM and Tool Integrations
Your CMDB needs to connect to your ITSM platform so that incidents, problems, and change requests can reference CI records directly.
Key integrations to configure at this stage:
- ServiceNow — Virima offers bi-directional CMDB sync. Discovered CIs and their relationship data are pushed into the ServiceNow CMDB on a scheduled basis.
- Jira / Atlassian — Links CIs and assets to Jira issues and projects for infrastructure-related work.
- Ivanti, HaloITSM, Xurrent, Hornbill, TeamDynamix — Virima integrates with all of these platforms for CI-to-ticket linking and ITSM data sharing.
Configure integrations before pushing production data. Testing the sync logic with a small representative subset of CIs before full rollout will save significant cleanup time.
If your organization plans to use ViVID™ for service mapping, this is also the stage to configure your service definition inputs. ViVID™ automatically builds application-to-infrastructure dependency maps — but the service definitions themselves must be provided by your team, either manually, via spreadsheet import, or through integrations like Lean IX.
Step 5: Define CI Ownership and Stewardship
This is the step most teams skip. It is also the step that determines whether the CMDB stays accurate six months after go-live.
Every CI class needs a designated owner — someone accountable for the accuracy of that CI class. They review stale records, resolve flagged discrepancies, confirm decommissions, and act as the escalation point when something looks wrong.
| CI Class | Suggested Owner |
|---|---|
| Physical Servers | Infrastructure Team Lead |
| Virtual Machines | Virtualization Team Lead |
| Network Devices | Network Team Lead |
| Applications | Application or Service Owner |
| End-User Devices | IT Asset Manager |
| Cloud Assets | Cloud Platform Team Lead |
| Databases | Database Administrator Team Lead |
Establish a review cadence for each CI owner — monthly for stable environments, bi-weekly for high-change ones. Put it in the service management calendar. If it’s not in the calendar, it doesn’t happen.
Step 6: Set Up CMDB Health Scoring
CMDB health scoring is your early warning system. It tells you, before an incident or change failure, which parts of the CMDB are going stale or losing completeness.
Virima’s CMDB health scoring tracks three dimensions:
- Accuracy — Does the data in the CMDB match what’s actually in the environment based on discovery results?
- Completeness — Are all required attributes populated for each CI record?
- Staleness — When was this CI last confirmed or updated by a discovery scan?
Set up health scoring during implementation — not after go-live. That gives you baseline metrics from day one, which makes it far easier to show improvement over time and catch drift before it becomes a data quality crisis.
Step 7: Plan Your Phased Rollout
A phased rollout is the mechanism that keeps the project from collapsing under its own scope.
Phase 1 (Weeks 1 to 8): Core infrastructure CI types only — servers, network devices, and virtual machines in one data center or one cloud region. Validate reconciliation rules, test integration syncs with your ITSM tool, and confirm health scoring is operational before expanding scope. The goal is a small, accurate, trusted dataset.
Phase 2 (Weeks 9 to 16): Expand to additional CI types — applications, databases, cloud assets across additional regions. Onboard CI owners for Phase 2 classes. Review Phase 1 data quality metrics before adding new data.
Phase 3 (Weeks 17 and beyond): Full environment coverage. Enable service mapping once CI data quality is high enough to support reliable dependency maps. Activate change impact analysis. Report baseline metrics to stakeholders.
The rule to remember: if Phase 1 data is not trustworthy, expanding scope only makes things worse.
Step 8: Validate Data Before Go-Live
Before declaring Phase 1 complete, run a formal data validation against your Phase 1 CI types:
- Coverage check. Does discovery account for all devices in scope?
- Completeness check. Are required attributes populated above your defined threshold?
- Accuracy spot check. Manually verify 5 to 10 percent of records across different CI classes.
- Duplicate check. Search for duplicate CI records on your match key fields.
- Integration check. Verify that CIs are syncing correctly to your ITSM tool.
Document the validation results. Stakeholders will want to see baseline data quality numbers when you present Phase 1 outcomes.
Step 9: Train the Team and Establish Operating Procedures
Technical implementation is half the work. Training should cover three groups: ITSM users (how to search and reference CI records), CI owners (how to review health scores and resolve flagged records), and discovery administrators (how to configure scan schedules and manage credentials).
Operating procedures to document before go-live: CI decommission workflow, new CI onboarding workflow, data quality review cadence, and reconciliation conflict resolution path. Put these procedures in your ITSM knowledge base.
Common CMDB Implementation Mistakes to Avoid
- Trying to do everything in Phase 1. Keep Phase 1 tight. Three to five CI types, one environment, two months.
- Skipping reconciliation rule design. This work needs to happen before go-live, not after.
- No CI ownership model. Assign ownership before go-live and build the review cadence into your calendar.
- Treating discovery as a one-time event. Set up recurring scheduled scans from day one.
- Pushing dirty data into your ITSM tool too early. Inaccurate CI data in production incidents erodes stakeholder trust faster than no CMDB at all.
- Ignoring health scoring. Set up health scoring in Phase 1 so you have baseline data to measure against.
- Underestimating the change management component. The people who log incidents, approve changes, and manage assets need to understand why the CMDB matters.
Conclusion
A CMDB implementation doesn’t have to be the multi-year slog that IT teams dread. With a narrow Phase 1 scope, solid reconciliation rules, assigned CI ownership, and health scoring configured from day one, your team can have a trustworthy CMDB in production within two months.
For teams ready to build a CMDB with confidence, see how Virima supports the full implementation path — agent-based and agentless discovery, multi-source reconciliation, CMDB health scoring, CI lifecycle management, and integrations with the ITSM platforms your team already runs. For a detailed framework on maintaining long-term accuracy, see our guide to CMDB best practices.
Schedule a Demo at Virima.
Frequently Asked Questions
How long does a CMDB implementation typically take?
A phased CMDB implementation typically takes four to six months from initial scoping to full environment coverage. Phase 1 — covering core infrastructure CI types in a limited environment — usually completes in six to eight weeks with a dedicated team.
What is the difference between a CMDB and IT asset management?
A CMDB stores configuration items and their relationships, focused on how IT components connect to and depend on each other. IT asset management (ITAM) tracks the financial and lifecycle status of hardware and software assets. Many platforms, including Virima, handle both in the same system.
What is a CMDB reconciliation rule and why does it matter?
A reconciliation rule defines how the CMDB handles conflicting data when two sources report different values for the same CI attribute. Without reconciliation rules, multi-source discovery produces duplicate or conflicting records that make the CMDB unreliable. Setting up reconciliation logic before discovery runs is one of the most important foundational steps in any CMDB implementation plan.
How does CMDB health scoring work?
CMDB health scoring evaluates the accuracy, completeness, and staleness of each CI record over time. Teams use health scores to identify which CI classes need attention, set governance thresholds that trigger review workflows, and track data quality improvement over time.
How does Virima integrate with ServiceNow for CMDB sync?
Virima offers bi-directional CMDB sync with ServiceNow. Virima runs scheduled discovery, populates CI records and relationship data, and pushes that data into the ServiceNow CMDB on a configured schedule — keeping ServiceNow populated with current, discovery-verified CI data for use in incident, problem, and change management.